In this exocademy Quick Tip, we’re going to review a method to virtually extract a tooth before we begin the design process. For example, we want to design a bridge pontic but the patient has not gotten the tooth extracted yet. We would like to create an ideally contoured pontic so we want to extract the tooth virtually and smooth the extraction site to design an ideal ovate pontic.
You can definitely perform a virtual extraction using multiple CAD programs and tools. This method uses exocad’s built in 3D data editor and free form tools to remove the tooth and contour the extraction site.
The first important point to note is that if you are going to virtually extract a tooth, it has to be done before you move forward in the exocad wizard. If you progress past a certain point in the wizard and commit the changes you make, you cannot go back and remove the existing tooth.
First, enter expert mode before moving forward at all in the wizard.
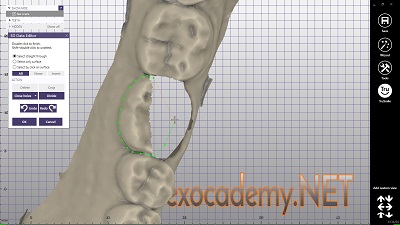
Next, select the scan data editor from your tools menu. Outline your tooth and remove the scan data. What remains is a jaw scan with a hole where the tooth was. You need to fill that area in with data so exocad doesn’t crash later on.
To fill the empty data hole, select the perimeter of the hole you just made so there is a gold selection ring around the hole and click the ‘CLOSE’ holes button in the 3D Data Editor window.
Now, you should have a flat area where the tooth was. You can proceed to design your restoration if you like, but you can contour the extraction area a little more to get a more anatomic result.
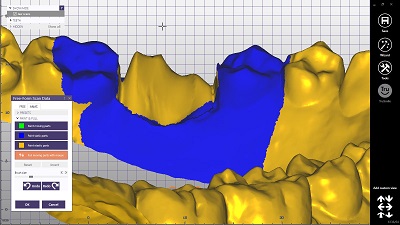
 For that, we want to exit the 3D data editor tool and use the free-form scan data tool. That tool gives us the option to add, remove, smooth, paint, push, and pull our scan data and contour it a little better.
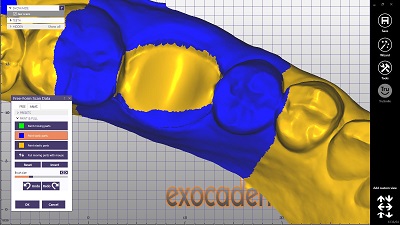
In the free-form tool, paint the areas we don’t want to move blue. These are static areas. Using the paint brush, paint the area that we want to contour either gold or green. Gold will make the area stretch and green will make the area bodily move without “pulling” or stretching adjacent areas.
Once you’re happy with how you’ve contoured the edentulous area, exit expert mode and return to the workflow wizard. Your tooth is extracted and you can design your restoration with better contours for an extracted tooth.

Responses