Set it and forget it
I know I keep telling you about the Virtual Articulator and the improvements exocad made with the newest release. But I can’t help myself! The improvements to settings and the automatic articulation algorithm have enticed me to utilize the module more often and consistently.
In previous versions of exocad the automatic articulation function worked sporadically which made me abandon the method altogether.
Then, I would have to manually orient the scans to the virtual articulator occlusal table. It wasn’t a huge inconvenience, but it was enough of a delay in my workflow that I simply wouldn’t use the articulation functions if I didn’t absolutely have to.
Then Valletta came along.
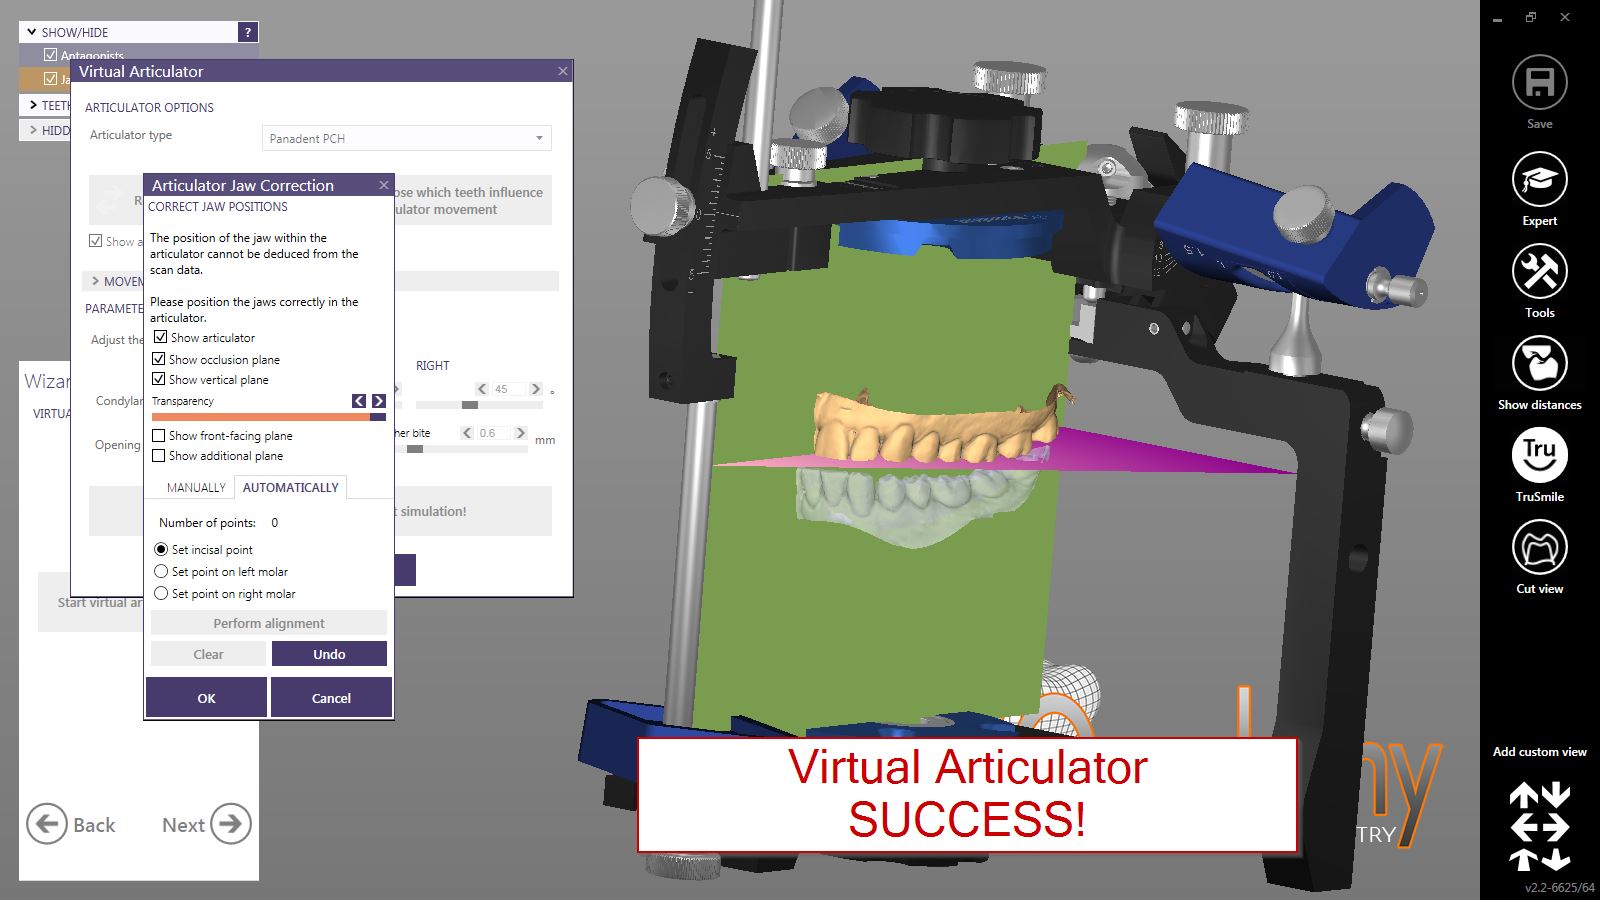
The most obvious change to me is the incorporation of the Panadent articulator. This is the articulator I use in my office so it’s exciting to have the virtual counterpart I can translate to my physical articulator and back.
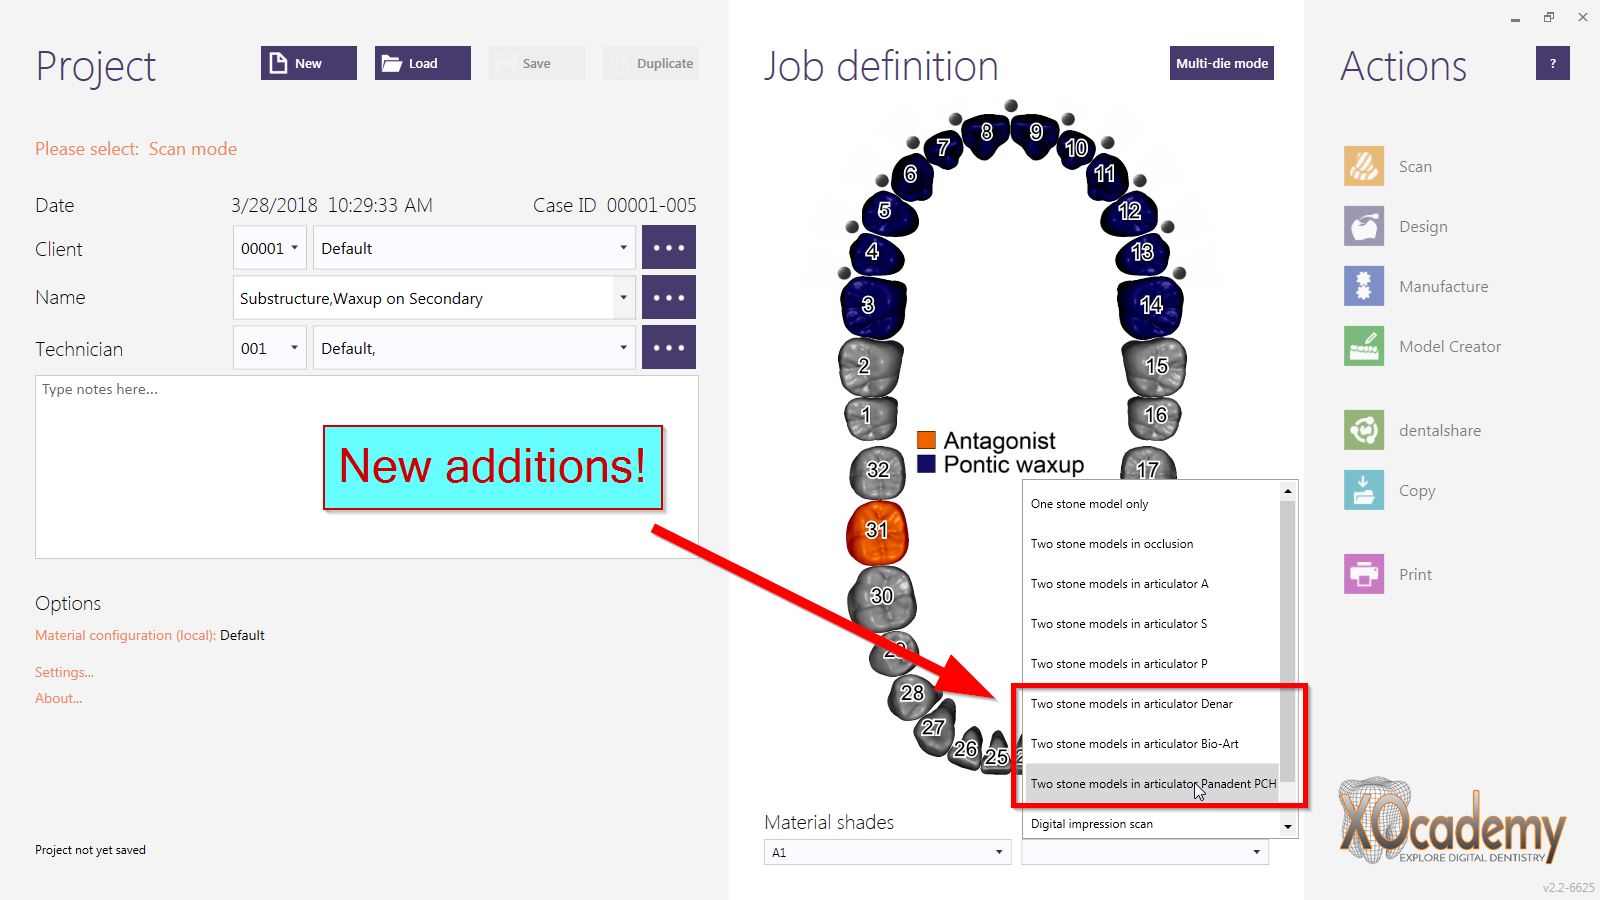
More subtle are the articulator defaults in dentalDB and CADApp that you can select as presets. In your Job Definition menu of dentalDB, you can now select the articulator you would like to use in the ‘scan mode’ drop down menu. Previous verions only allowed A, S, and P-type articulator selections from dentalDB. (Note that you have to define upper and lower jaw scans to enable the virtual articulator options.)
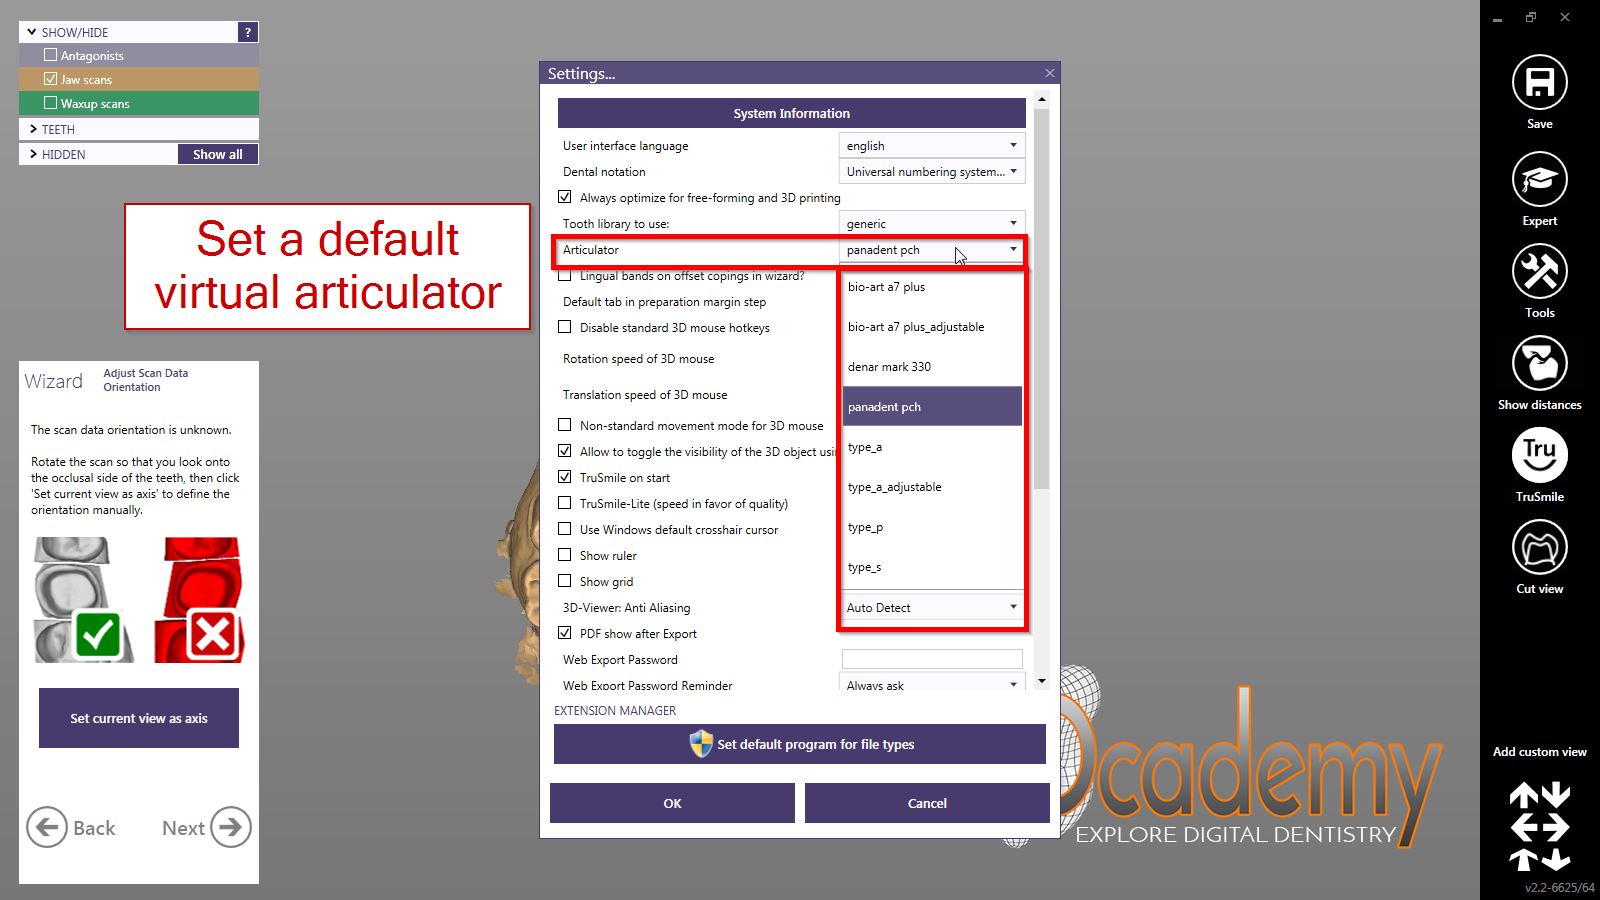
We are also given default settings options in CADapp. Once you get your job going you can set the default articulator instead of having to select the same option every time in the Virtual Articulator module.
This speeds up my workflow because the Panadent is the only articulator I use.
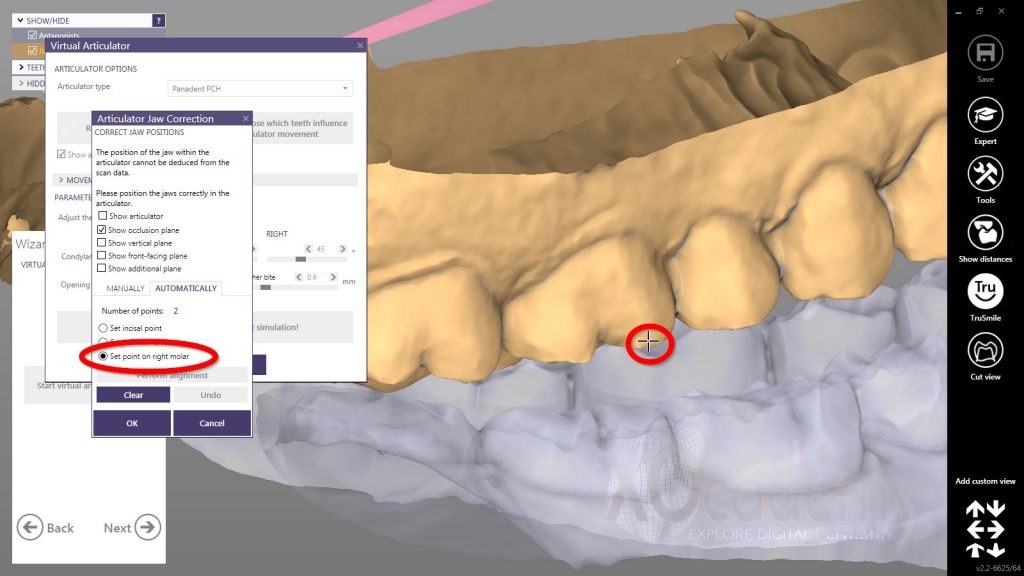
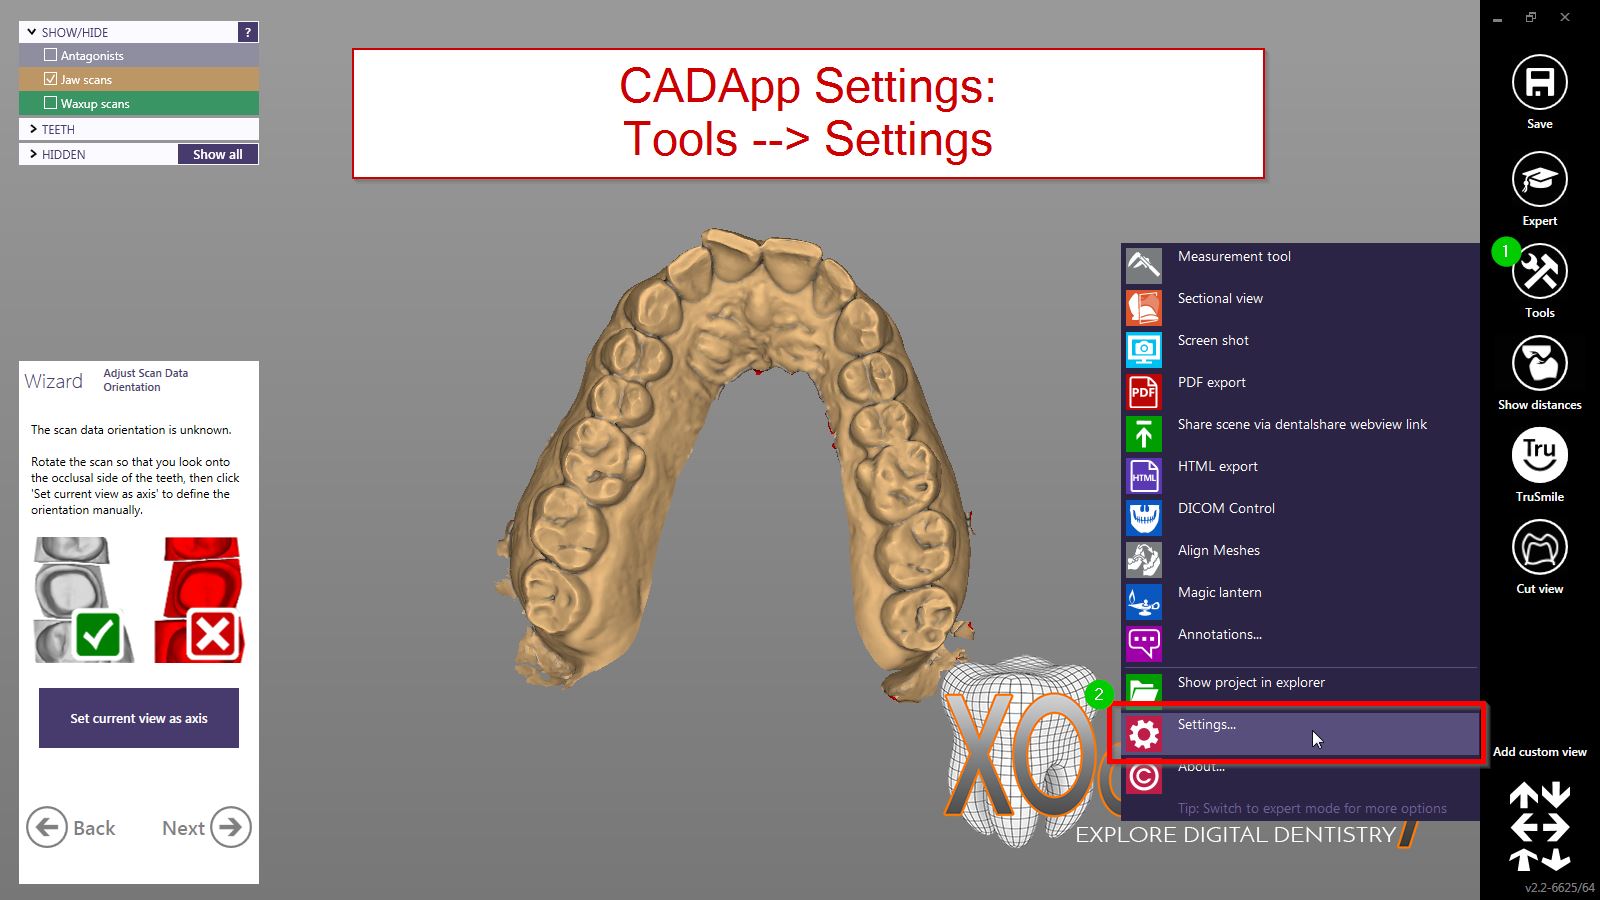
You can set your default articulator in CADapp in the Settings option under the Tools menu. In the ‘Articulator’ drop down menu you can set your default articulator to any of the available options. No more limitations! Let’s walk through how the automatic articulation algorithm functions and how we virtually mount our scans.
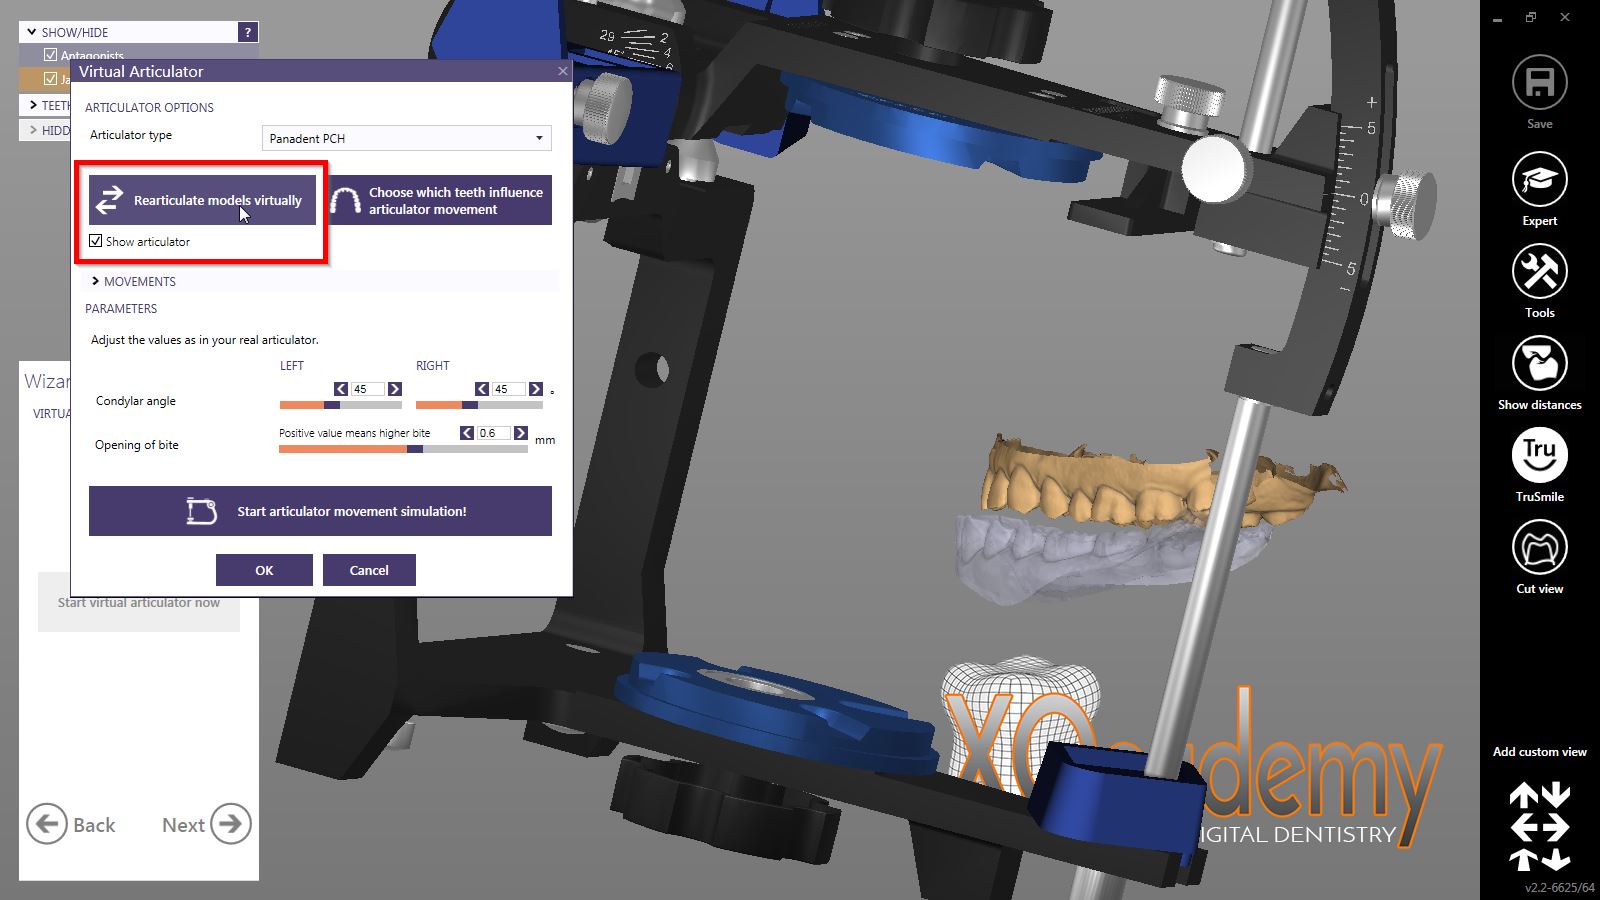
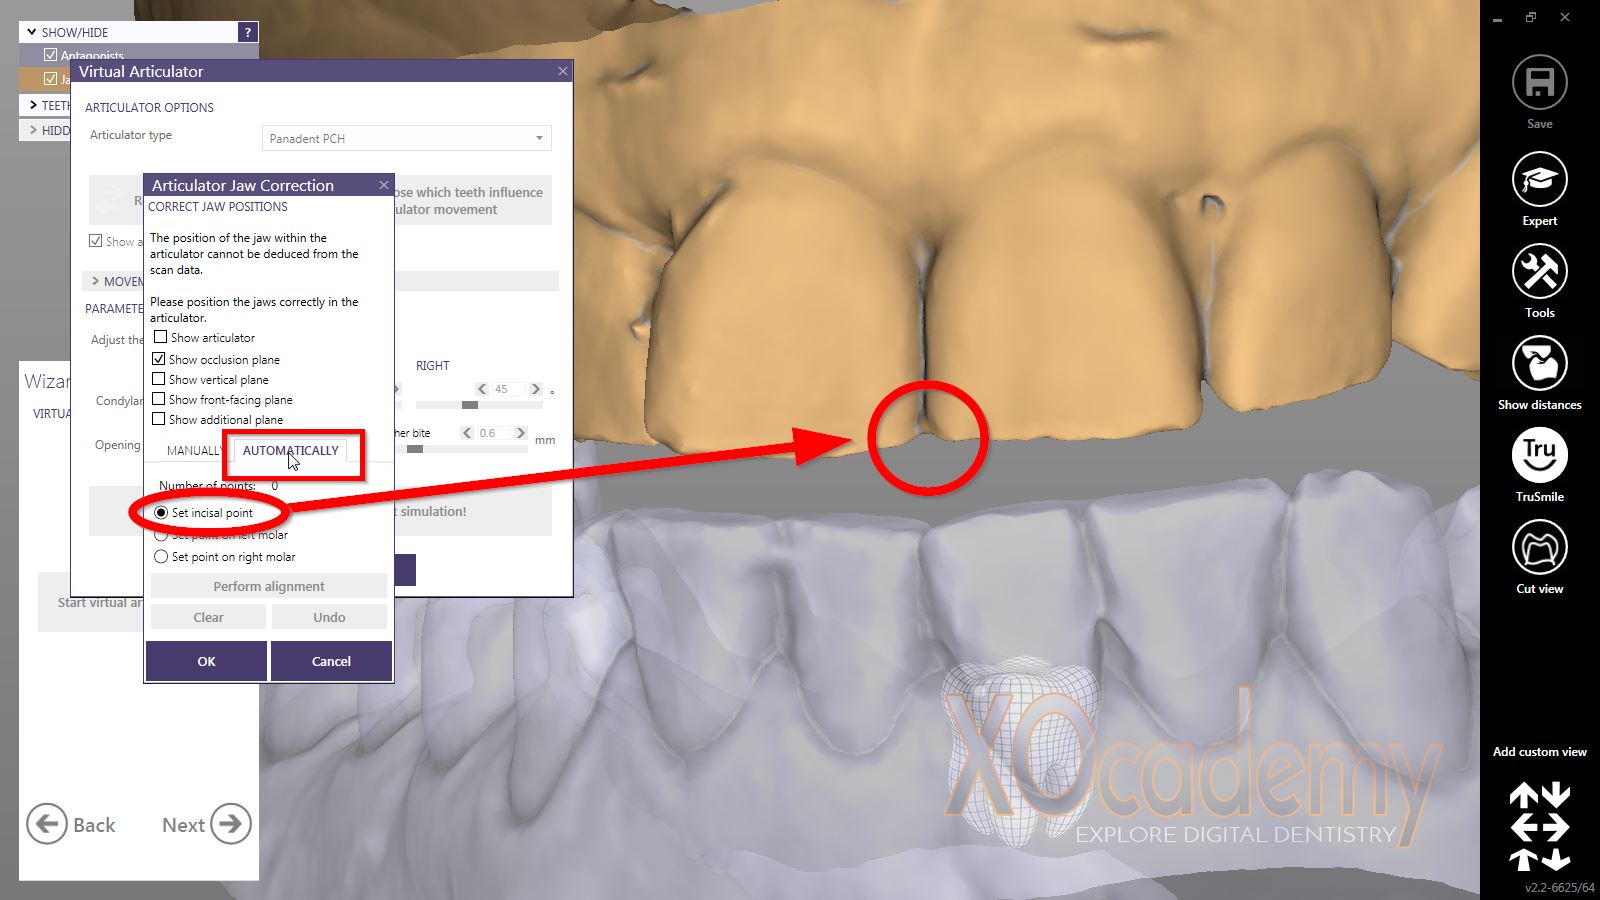
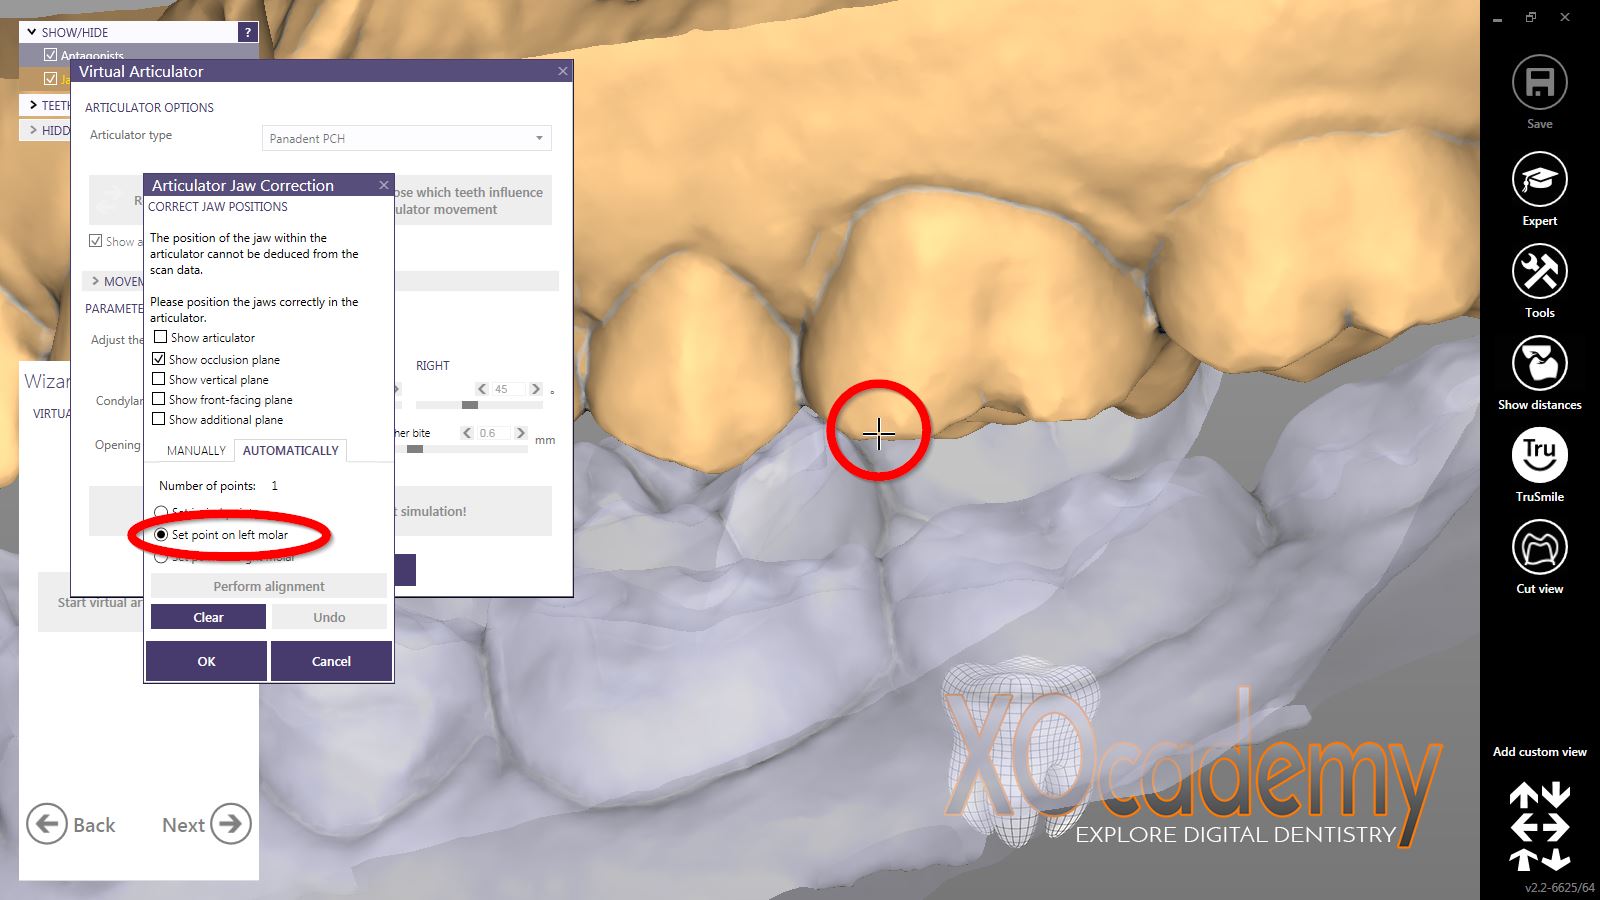
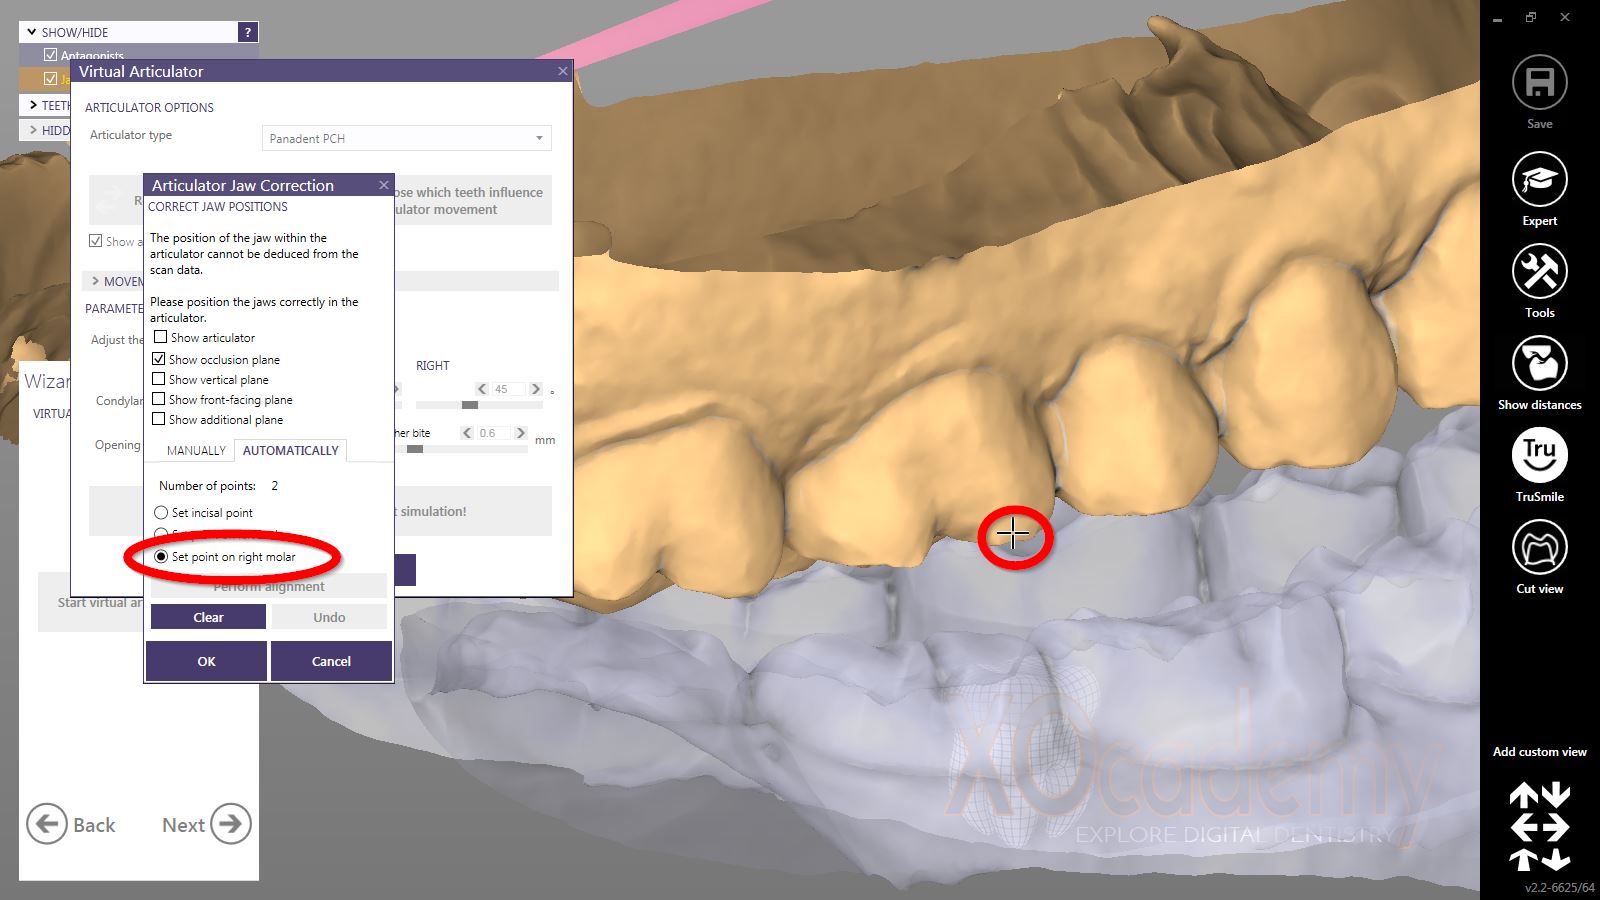
First, we have to open the virtual articulator module. Once there we enter the ‘Rearticulate Models Virtually’ function. Using the automatic jaw correction function allows us to set the jaw scans in three clicks: the vertical midline center point, and the right and left posterior points. Now we have articulated jaw scans, with excursions demonstrating a functional occlusion, in three clicks. Before you could say that using the Virtual Articulator for every case might be overkill. Now, you’ve got no excuses!
Being able to rearticulate jaw scans quickly and reliably has changed my regular workflow to incorporate the virtual articulator functionality for every case.
My restorations have improved designs and esthetics and at the same time require fewer adjustments and chairtime at delivery. The new settings and functionality within the virtual articulator module have forced me (albeit to my delight) to become a better technician AND dentist.